So ya ya it's been a while blah blah blah... let's just pretend I've been actively posting the last year and a half... it will be a lot easier than trying to explain the reason for my blog absence other than I have none except life... it happens... lets move on.
So feeling the need for a project last weekend, since the Hubs was working under deadline, I started perusing everyones favorite time-suck Pinterest. and stumbled upon this (and can I tell you how I loathe pins that link to NOTHING.)
Seemed easy enough right... it's a piece of wood and some hooks... how hard could it be... (said me everytime something turns out harder than expected, it's like a curse... you'd think I'd learn by now.) So not really knowing much about lumber I enlisted the help of my dear ole Dad to make the trip to Home Depot with me. After taking some measurements regarding size, counting my sizable mug collection (23) and scoping Home Depot out online to get an idea about supplies we headed off...
Showing posts with label decorating. Show all posts
Showing posts with label decorating. Show all posts
March 9, 2014

August 7, 2012
It's a Pinterest Project!
So I finally joined Pinterest. I sorta refused to join while in the midst of wedding planning because I knew with the magnitude of information and ideas out there I would never get anything done and so many weddings were beginning to look the same because of Pinterest I wanted mine to be different, also I figured if I didn't look I could think that the ideas I came up with were totally original and all my own instead of finding out that someone back east (or where ever) already came up with them. So now since I have some time on my hands I figured I'd give it a whirl. Yep its addicting, yep you can lose hours pinning or going through boards, this I all knew but I have decided that if I am going to spend time pinning then I can spend equal time doing. So here it is my first Pinterest Project. I took this pin and figured how hard could it be...
November 14, 2011
Color Combo Crush- Grey & Yellow
 |
| via |
I'm a sucker for a good geometric print, they are visually interesting but maintain some masculinity, and in this grey it spoke to me. Saying "hang me over your kitchen window, make a roman shade out of me, you know you want to" and well... I did. Also it happened to be on sale at 50% off I was able to get 2 yards for the price of one and at regularly $30/yard it was a steal. (it's currently 40% off at JoAnn's) Well today was like Christmas came early and I got my roll of fabric. At 54'' wide and 2 yards I have more then enough to roll around in it like it's money make my desired roman shade and then some. Other prints I'm in love with and thinking of using to make pillows for the kitchen table chairs a window covering of some kind for the half-bath
 |
| via |
 |
| via |


next to the wall, seriously I need a better camera the pictures don't do it much justice. It's so yummy together.
I plan to make a roman shade much like described here, now I've just got to finish the rest of the cabinets so I can move on to this project.
November 7, 2011
We Don't Need No Stink'n Cabinet...
One of the first things we did in the kitchen aside from painting was to take down the lone cabinet to the right of our sink. Upon first glance there was nothing wrong with said cabinet but upon further inspection we deemed it useless, or I did any way... with the positioning of the cabinet, and the fact that the doors didn't swing open wide, me and my short little frame and less then impressive arm span, I couldn't reach anything inside. I don't have any real good "before" pictures (no surprise there) but here is one from when we were painting where you can see where it was...
Removing the cabinet seemed to open up the space which I liked, but clearly something would need to go up in it's place. The F-Hub lobbied for mounting a flat screen on the wall there... where I could see the appeal, I figured that with the 63 inch in the next room we really didn't need another 15 feet away. I have always been a fan of open shelving. thus enters my favorite store (IKEA) and my newest favorite find there...


 |
| see empty space next to window |

The Fabian Wall Shelf. with a $6.99 price tag it beat out all the other shelf options I was looking at. Now it seems simple enough but since the wood is unfinished it opens up a world of options. Since I am in the midst of refinishing all the cabinets in the kitchen I just threw those in the mix and used the same paint on the shelves though I was tempted to be a little more adventurous and go for a splash of color but thought I'd play it safe with the kitchen. The installation is also very easy just be sure to use drywall screws/anchors or anything heavier then a pillow is gonna rip a regular screw out of the wall... and no I didn't learn this the hard way... I am all about drywall screws... I've just about mastered the technique. So anyhoo... after a few minutes with a drill, screwdriver and a level I had this....

Now I know I am awful when it comes to taking pictures along the way... but here they are in all their glory. The downside for some with the concept of open shelving is the need to make it pretty... since everyone can see it... you can't exactly store your Tupperware on them. But for me I can make it functional as well as aesthetically pleasing. I've got enough decorative items to make it interesting but I've also got my extra set of dishes, extra glasses, some of my serving platters and some personalized mugs to keep it functional. I do plan on moving the wicker baskets and hanging wine glass racks... but of all the screws I have... none that are small enough, so that will have to wait.


The Vases and monogrammed mugs are from Anthropologie and most the dishes are from Ikea, everything else are just trinkets and odds and ends I had on hand. All in all I am very happy with the results. Now if only the rest the cabinets would paint themselves.
UPDATE: I am almost done with all the lower cabinets and the bar. I should have that part of the project completed by Wednesday (fingers crossed) and then will move on to the uppers this weekend... hoping to wrap it all up by the end of next week and move on to the next project!
November 4, 2011

October 24, 2011
Let There be Light
... and a decent one at that. So revisiting the kitchen... I'm not very good at taking before pictures if you haven't noticed but from this picture from this post you can sort of see our spaceship of a light fixture over the table.

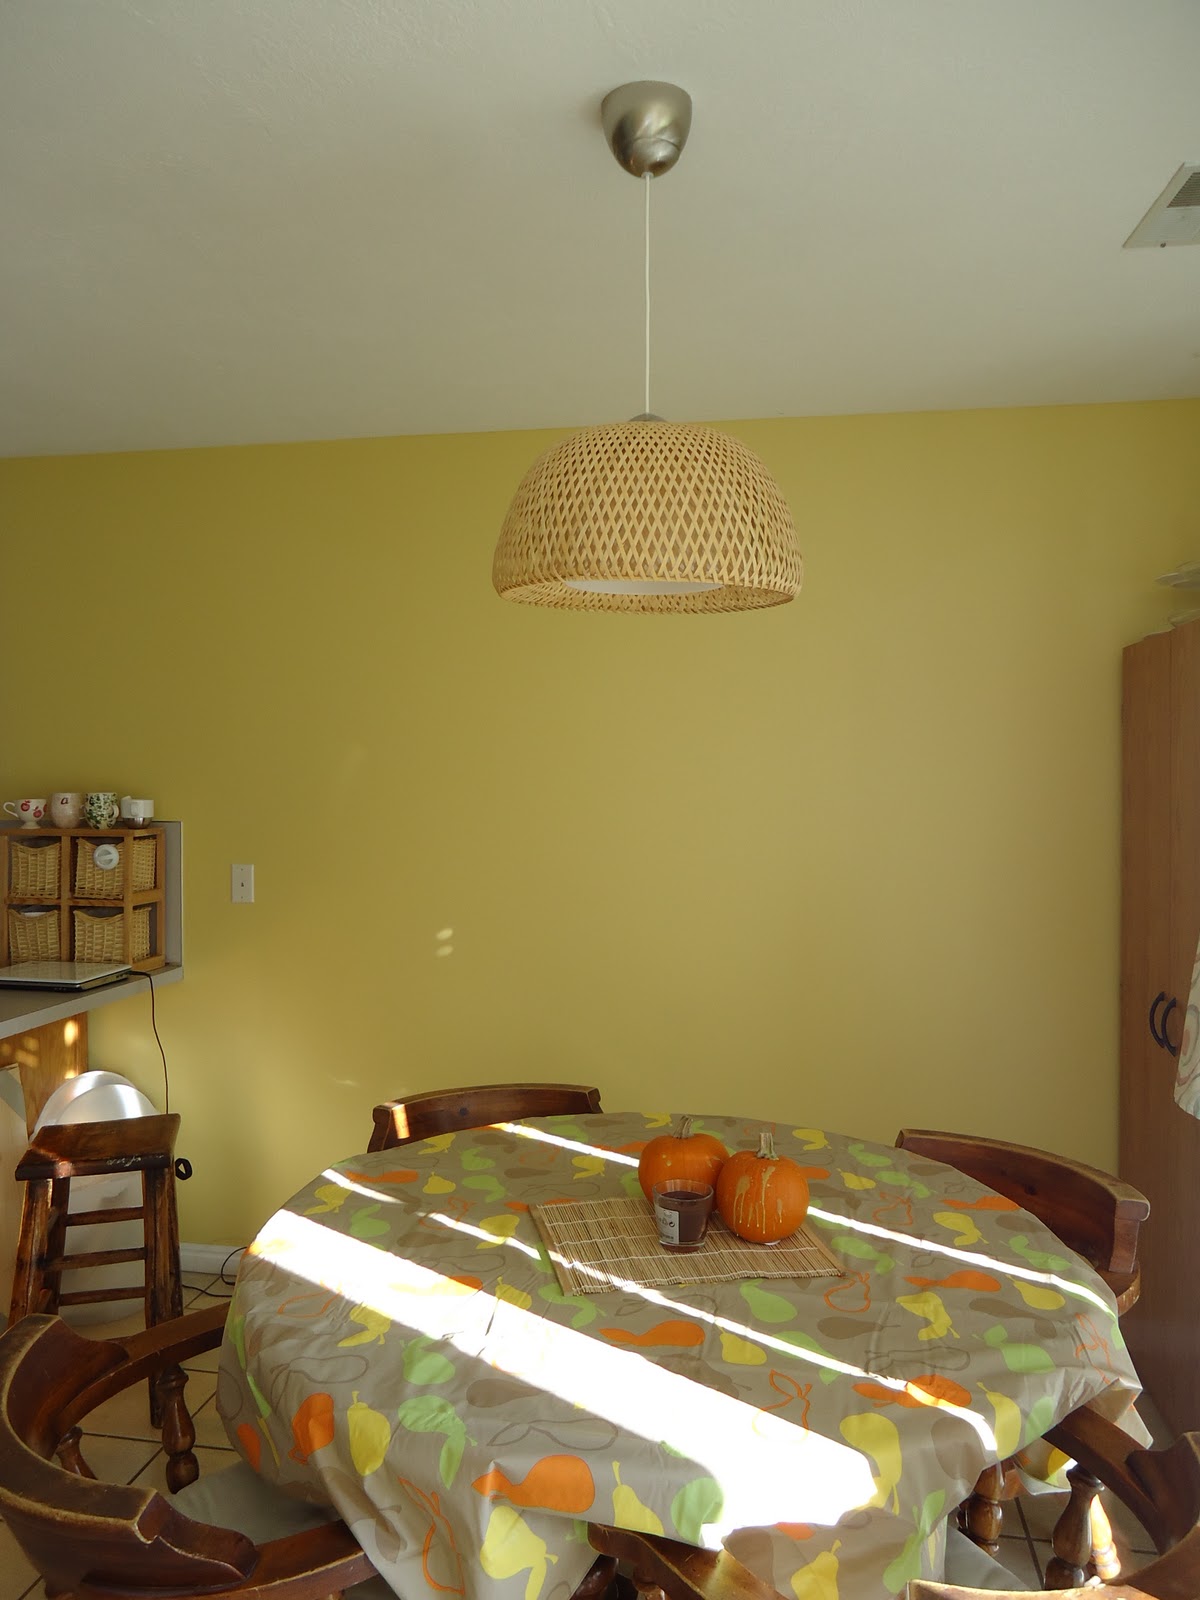
I also was not a fan of that. After given the opportunity to change it out I jumped and the chance and while on an outing to my favorite Swedish furniture store picked up this dandy.

We had Clint's parents over for dinner the other night and had them help us instal it. The process seemed easy enough but having never really dealt with electrical stuff thought it would be best left to some one who had a little experience. After a few moments with a screw driver, some wire cutters and a flashlight we had this

I think its perfect. Fits the space just as I had envisioned
 |
| would have closed the door but the animals were too busy staring at sheep |
and looks good with the yellow wall...
Next up in the kitchen... refinishing the cabinets with this
 |
| via |
My mom just used it on her cabinets and they look great. Ours right now are the yellow-ey oak with horrible brass knobs. we picked up the dark kit (the light kit is shown above) and had it tinted dark brown (chocolate to be exact) This could get interesting... wish me luck (when I get around to it... though this project is creeping up the list)
October 23, 2011
If You Can't Buy It... Paint It!
Okay that doesn't always work but in this case it did.... After we decided on wood floors for the living room we knew we'd need to get a rug to put down. After a brief search I stumbled upon this beauty at West Elm.
I was in love. the colors the shape everything was perfect, well almost everything. After realizing the price was a bit out of our budget we settled on a rug from Home Depot that was half the price. I was a bit heart broken as I was sure that rug was meant to be in our room. So.... I got creative (as I often do) and ran to the store to pick up a few supplies and after some tedious moments with a blank canvas and some pattern tape I came up with this...

I printed off a picture of the rug and laid down the tape lines accordingly. I then went on to mix and match paint to match the colors of the rug, though you could use any colors really. After the fact I realized it would have been easier to paint the whole canvas the neutral color between the color blocks since I didn't want to leave it white and it was a pain to go back in and cut the lines, but lesson learned I guess.

 |
| via |

I printed off a picture of the rug and laid down the tape lines accordingly. I then went on to mix and match paint to match the colors of the rug, though you could use any colors really. After the fact I realized it would have been easier to paint the whole canvas the neutral color between the color blocks since I didn't want to leave it white and it was a pain to go back in and cut the lines, but lesson learned I guess.

The finished product now resides in the living room on the shelves above the couch. Styled with a few trinkets that were in my old apartment and a few new additions. I feel pretty good about it. It is a good substitute for the rug and the kaleidoscope pattern makes for interesting custom artwork and the cost of supplies (about $10 for the canvas and the pattern tape) was a steal in comparison to a $400 rug that my cat would have probably puked on anyway :) I guess the moral of this post is that if you like something that is out of reach like an expensive rug or painting or print... don't be afraid at trying your hand at reproducing it. You don't have to be an artist to make art and in the end I think it will mean more to you then dropping the money on the original item.
October 21, 2011
Craft Time!!
As I continue to get things situated in the living room it occurred to me there were not many actually crafty touches. I'm a semi crafty girl but I'm not in to super cutesie over the top craft things I was aching to do something that would fit our style just right. So I made these...

Following this post at a favorite blog of mine. I followed the steps, and as you can see are actually super easy,I didn't make my leaves as big and I wish I'd used a heavier wire but all in all I think they turned out really pretty. I arranged them in my most favorite Anthropologie vase, that was a house warming gift from my sister and viola! they are now sitting on top a bookcase from my old apartment that houses our media collection.


Following this post at a favorite blog of mine. I followed the steps, and as you can see are actually super easy,I didn't make my leaves as big and I wish I'd used a heavier wire but all in all I think they turned out really pretty. I arranged them in my most favorite Anthropologie vase, that was a house warming gift from my sister and viola! they are now sitting on top a bookcase from my old apartment that houses our media collection.

I think it adds just the right touch. I've styled it with some candlesticks, an Ikea mirror, my deer plate from Park City that I picked up here, a picture from the first night me and the F-hub first really talked (Happy New Year indeed) and a picture of a historical church (though not really sure which one) from our trip to Boston.

On the wall above it is a print I picked up on a trip to Seattle at the University of Washington Bookstore of Mt. Rainier. I try to surround myself with the things that make me happy, in life and when decorating. I think this little snippet of the living room is a good example of that. It's about the only part of the living room finishing touches I feel is finished and it def makes me happy happy every time I look at it.
I've got more planned for the living room and can't wait to update on my latest project!
October 19, 2011
Fabric Frenzy
So many people have told me that wedding planning can be so stressful. So far I haven't experiences that granted I gave myself plenty of time so right now after planning the big stuff, location, dress, photographer band, it's just been working on the details- which is my favorite part. So colors. these are what we're going with ( and by we, I mean ones that I've chosen and Clint is going along with lol)


With our giving too much away as far as what is what, I want it to be a pretty neutral setting with greens, and a pops of teal. It is a mountain wedding and I didn't want the color scheme to look out of place- plus hot pinks etc just aren't my thing. I will be doing a lot of the finishing touches myself, including certain fabric elements. This led me to spend a few hours one night looking at fabric swatches online and I came up with this...

I'm loving the teal Ikat (second one in top left and mid top right) and am having an affair with the chevron print (bottom left) but there are so many to work with. I'm thinking I'll narrow it down to 3 or so, I don't want it to be too visually assaulting and all over the place.But since the base fabric will be either burlap or a raw linen I want the others to be fun and more of a statement. I have my favorites... but what do you all think (and by all I'm asking the 6 or so followers I have lol... or those that want to start following... :) ) I'd love to hear your opinions!!
October 18, 2011
The Living Room....
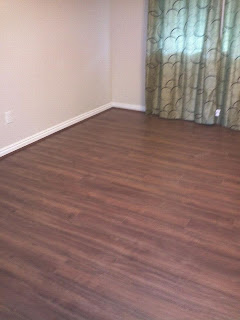
So prior to me making the big move, the F-Hub (Future Husband) and I decided that because I'm coming with baggage in the form of four legged friends, one of which had already taken a liken to digging in the carpet in the living room and the other an allergy issue for family, that we would replace the carpet in the living room with wood floors (of the pergo variety). The carpet was new when the F-Hub moved in a few months ago but we thought replacing it would be a better alternative to what I was bringing to the table (oh I brought the table too) so we started with this...

I love the look of wood but it can come across cold and uninviting so of course we needed to add some sort of floor covering. We found this...once again at our local Home Depot. It was a great price for the size (8x10 ft) it wasn't my first choice but at half the price of the one I lusted over it's a close second.


Brown, not bad but...
We went to Home depot and checked out our options. We both decided on a Walnut Stain and we ended up with this...

soo much better...
I love the look of wood but it can come across cold and uninviting so of course we needed to add some sort of floor covering. We found this...once again at our local Home Depot. It was a great price for the size (8x10 ft) it wasn't my first choice but at half the price of the one I lusted over it's a close second.

and though it looks like if covers the whole floor it does not. the pattern gives it dimension and some class without being too much in the space.
after shuffling the couches around to get the rug in we finally moved them back in, thank goodness it's a sectional otherwise it wouldn't have happened.

and I realize these are not the best pics but my phone is always
handy, with out it I fear I wouldn't have pictures of anything.
Pay no attention to the curtains as those are on their way out. Soon to be replaced with a set I got at my favorite Swedish store. I'm sticking with blue/grey/neutral tones in this room. Re-using a few things from my old place with out just recreating the same space. Stay tuned for more as it all comes together, including DIY art, and furniture styling and my favorite NEW PILLOWS :).
October 14, 2011
The Kitchen...
made me so angry every time I went in. I figured since I would be in this space the most it needed to be a place that was soothing and conducive to culinary crafting. Which is why this... would ... not ... do.

I am not a red accent wall kind of person. Some people are and it looks great in their homes, but I am not. The only thing it represented was my anger for it. and to add to it the half bath off the kitchen was painted to match. Anger, Anger, Anger. I'm a firm believer that colors can change your mood. and this red would not do. so... we painted. First the bathroom, we used the existing tan left over from the other 3 walls in the kitchen


We then moved on to the kitchen now I think the F-Hub took a risk letting me insist on the paint color... cause I'm pretty sure most men wouldn't be down with yellow, well officially it's called Tahini by one Ms. Martha Stewart herself, but this is what we did... and bless his heart he actually did most the painting since I was still technically living in Salt Lake.

There is a lot left to do, we have plans to refinish the cabinets, change out the hardware, hang some shelves where the cupboard was, new counter tops and a tile backspash, and change out the light over the table so it is, as much is... a work in progress. but I love how the color turned out its much more inviting and warm and a place I don't mind being in. I can't wait to update on its progress.
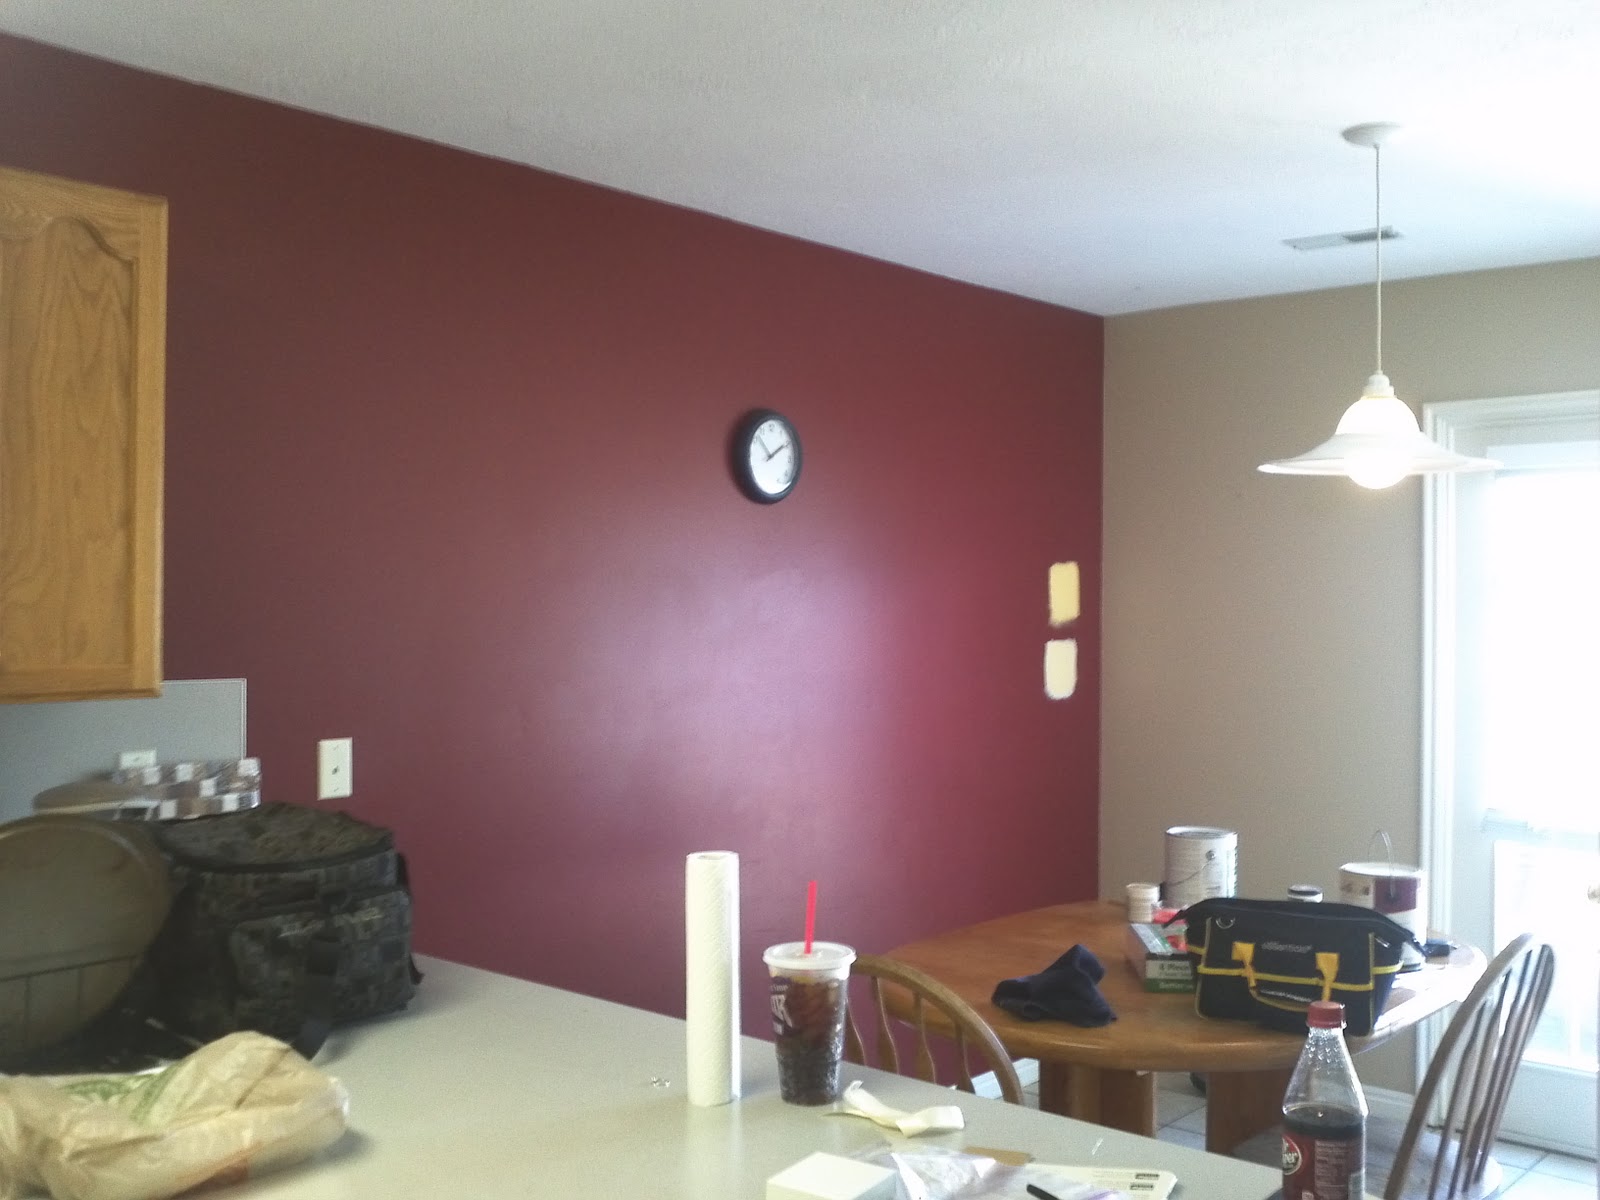
never mind the mess... but this is what we started with
I am not a red accent wall kind of person. Some people are and it looks great in their homes, but I am not. The only thing it represented was my anger for it. and to add to it the half bath off the kitchen was painted to match. Anger, Anger, Anger. I'm a firm believer that colors can change your mood. and this red would not do. so... we painted. First the bathroom, we used the existing tan left over from the other 3 walls in the kitchen

no one looks good with a red background

primed and painted... and so much better!
We then moved on to the kitchen now I think the F-Hub took a risk letting me insist on the paint color... cause I'm pretty sure most men wouldn't be down with yellow, well officially it's called Tahini by one Ms. Martha Stewart herself, but this is what we did... and bless his heart he actually did most the painting since I was still technically living in Salt Lake.

we also took down a cabinet over the bar... but here is the final color
There is a lot left to do, we have plans to refinish the cabinets, change out the hardware, hang some shelves where the cupboard was, new counter tops and a tile backspash, and change out the light over the table so it is, as much is... a work in progress. but I love how the color turned out its much more inviting and warm and a place I don't mind being in. I can't wait to update on its progress.
April 4, 2011
I Can Sew a Straight Line...
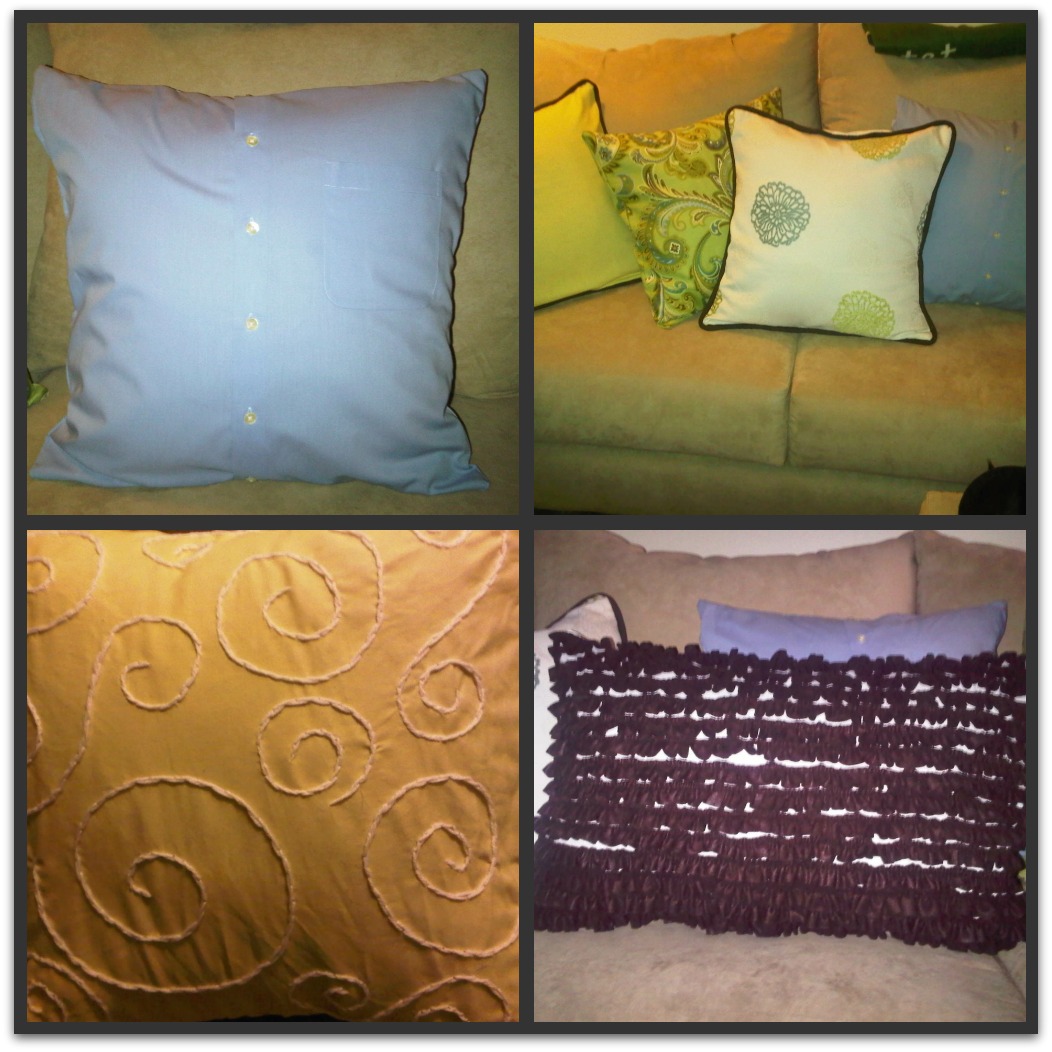
So I'm sharing my latest obsession...PILLOWS!!! ok ok ok I wouldn't say "obsessed" per se... but here are a few of my little friends...
 I once tried to sew curves... lets just say I make pillows for a reason... (tutorials for some of these will come in a later post... for now let me know if you want the deets) and truthfully I had no idea what I was doing when I started... it was sort of a happy accident... had some fabric left over from a previous project and just thought I'd see what I can come up with... and its just gone on from there... I get an idea or see one and attempt to recreate it... so far I've had much luck... so if any of you have an idea or have seen something out there I'd love to hear it... I'm always up for a challenge... just so long as it's straight lines.
The one that started it all (see the ugly one next to it... it's no wonder I covered them) 

 Next thing I know I have...
  and...
  looks like I still have room I can squeeze a few more in...there are 2 on there that I did buy, but they were on clearance and super cheap (thank you Landsend.com) and ones I had wanted to make but couldn't find the right materials ...

Which turned into...

and they became...
 Next thing I know I have...
  and...
  looks like I still have room I can squeeze a few more in...there are 2 on there that I did buy, but they were on clearance and super cheap (thank you Landsend.com) and ones I had wanted to make but couldn't find the right materials ...
 I once tried to sew curves... lets just say I make pillows for a reason... (tutorials for some of these will come in a later post... for now let me know if you want the deets) and truthfully I had no idea what I was doing when I started... it was sort of a happy accident... had some fabric left over from a previous project and just thought I'd see what I can come up with... and its just gone on from there... I get an idea or see one and attempt to recreate it... so far I've had much luck... so if any of you have an idea or have seen something out there I'd love to hear it... I'm always up for a challenge... just so long as it's straight lines.
Subscribe to:
Posts (Atom)


