Showing posts with label projects. Show all posts

March 24, 2014

Spring Has Sprung... and Apparently So Has My Motivation

Spring is Here! The weather has been slowly getting better and better (which, I assume will take a turn for the worse any day now... we're due up for at least one more blizzard) but it means pool season is just around the corner! In preparation for summer there have been some good things going on around here... a few weekends ago we cleaned the house top to bottom, which is such a cliche way to kick spring off but hey... it works. The sun comes out, the layers come off and as we stumble out of our winter hibernation it's nice to just get the dust off everything (and in our case cat and dog hair).  Once done on the inside I moved outside to the project that is our back yard. Having gone all winter without a helping hand and being abused by three dogs the yard was in pretty poor shape, nothing a few choice words for the pine trees and the dogs for both equally littering the yard with their droppings and an hour of steady raking (seriously though, our yard isn't that big) it started to look more like the cute quaint space I fell in love with, than the hazardous waste sight it had become over winter. This last weekend we decided to gate the grass and patio off from the dogs and throw down some grass seed hoping to fill in some of the barren spots. My fingers are crossed that my (plant) killing spree has ended and the little seeds take root. Maybe if I pep talk the yard everyday and lay out my vision for this summer it will rise to the occasion and grow, let's hope I have ambitious grass.

Pine needles everywhere you look

March 9, 2014

Pinterest Project: DIY Wall Coffee Mug Rack... How things are never as easy as they seem and why I should have listened to my father the first time

So ya ya it's been a while blah blah blah... let's just pretend I've been actively posting the last year and a half... it will be a lot easier than trying to explain the reason for my blog absence other than I have none except life... it happens... lets move on.

So feeling the need for a project last weekend, since the Hubs was working under deadline, I started perusing everyones favorite time-suck Pinterest. and stumbled upon this (and can I tell you how I loathe pins that link to NOTHING.)


Seemed easy enough right... it's a piece of wood and some hooks... how hard could it be... (said me everytime something turns out harder than expected, it's like a curse... you'd think I'd learn by now.) So not really knowing much about lumber I enlisted the help of my dear ole Dad to make the trip to Home Depot with me. After taking some measurements regarding size, counting my sizable mug collection (23) and scoping Home Depot out online to get an idea about supplies we headed off...

August 7, 2012

It's a Pinterest Project!

So I finally joined Pinterest. I sorta refused to join while in the midst of wedding planning because I knew with the magnitude of information and ideas out there I would never get anything done and so many weddings were beginning to look the same because of Pinterest I wanted mine to be different, also I figured if I didn't look I could think that the ideas I came up with were totally original and all my own instead of finding out that someone back east (or where ever) already came up with them. So now since I have some time on my hands I figured I'd give it a whirl. Yep its addicting, yep you can lose hours pinning or going through boards, this I all knew but I have decided that if I am going to spend time pinning then I can spend equal time doing. So here it is my first Pinterest Project. I took this pin and figured how hard could it be...

January 9, 2012

Who Says You Can't Be Lazy and Creative...

Yesterday may have been one of the laziest days ever... I think I slept in till 1, never got out of my pajamas and just lounged around with my Love and the animals. In between lounging I did have some wedding ideas on the mind. If you all keep tabs on any blogs you may have seen the subway poster art that is all the rage. here are some examples


Well some have gone a step further and made them... well let's say "cutesy"


I'm not really one for the cutesy ones but one day a while back while perusing the Internet for wedding ideas I came across an Etsy shop (which of course I didn't save the name of...whoops) that had taken the Subway art one step further and personalized it for a couple. I thought the idea was actually kinda genius and a fun touch for wedding decor and being the kinda do-it-yourself kinda girl I sat down at the trusty laptop to give my hand a go at it... this is what I ended up with


I like how it tells a story, albeit the Campbell's Condensed Soup version. I have a vision of this blown up and displayed at the sign in table or something at the wedding to give our guests a glimpse into our little story. This is still a rough draft, I may still tweak a few things design wise, but having just been messing around I think it turned out pretty good. I am defiantly drawn to wedding decor that drips with personal touches. I know that for us I want our guests to feel like they are not just attending a ho-hum cookie cutter wedding. I want them to leave feeling like they know us a little better, and that they were given a glimpse of our life together and are as excited about it as Clint and I are. I also like how we can keep this and hang it up at home and have a reminder of how we got to where we are together. Cheesy? maybe... but I love a little cheese now and again.

xoxo


November 23, 2011

Some Proper Before and Afters...

 So it has been a long time coming, granted I took a few breaks in-between but I can with much pleasure say the cabinets are done!! and man do they look good. it's like a whole different kitchen. I still need to paint the baseboards to match but that is minor in the whole scheme of things and that will have to wait until after Turkey Day. But now... the long awaited (if only for my benefit) before and afters!!


messy picture I know but hey... we do live in this kitchen... but doesn't the brass just seem to glow like creepy eyes... yuck!

and the sleek after...


Never mind my Pie baking "goods" peeking out in the corner... I'm prepping for the "big"day :) here are some more beauts!


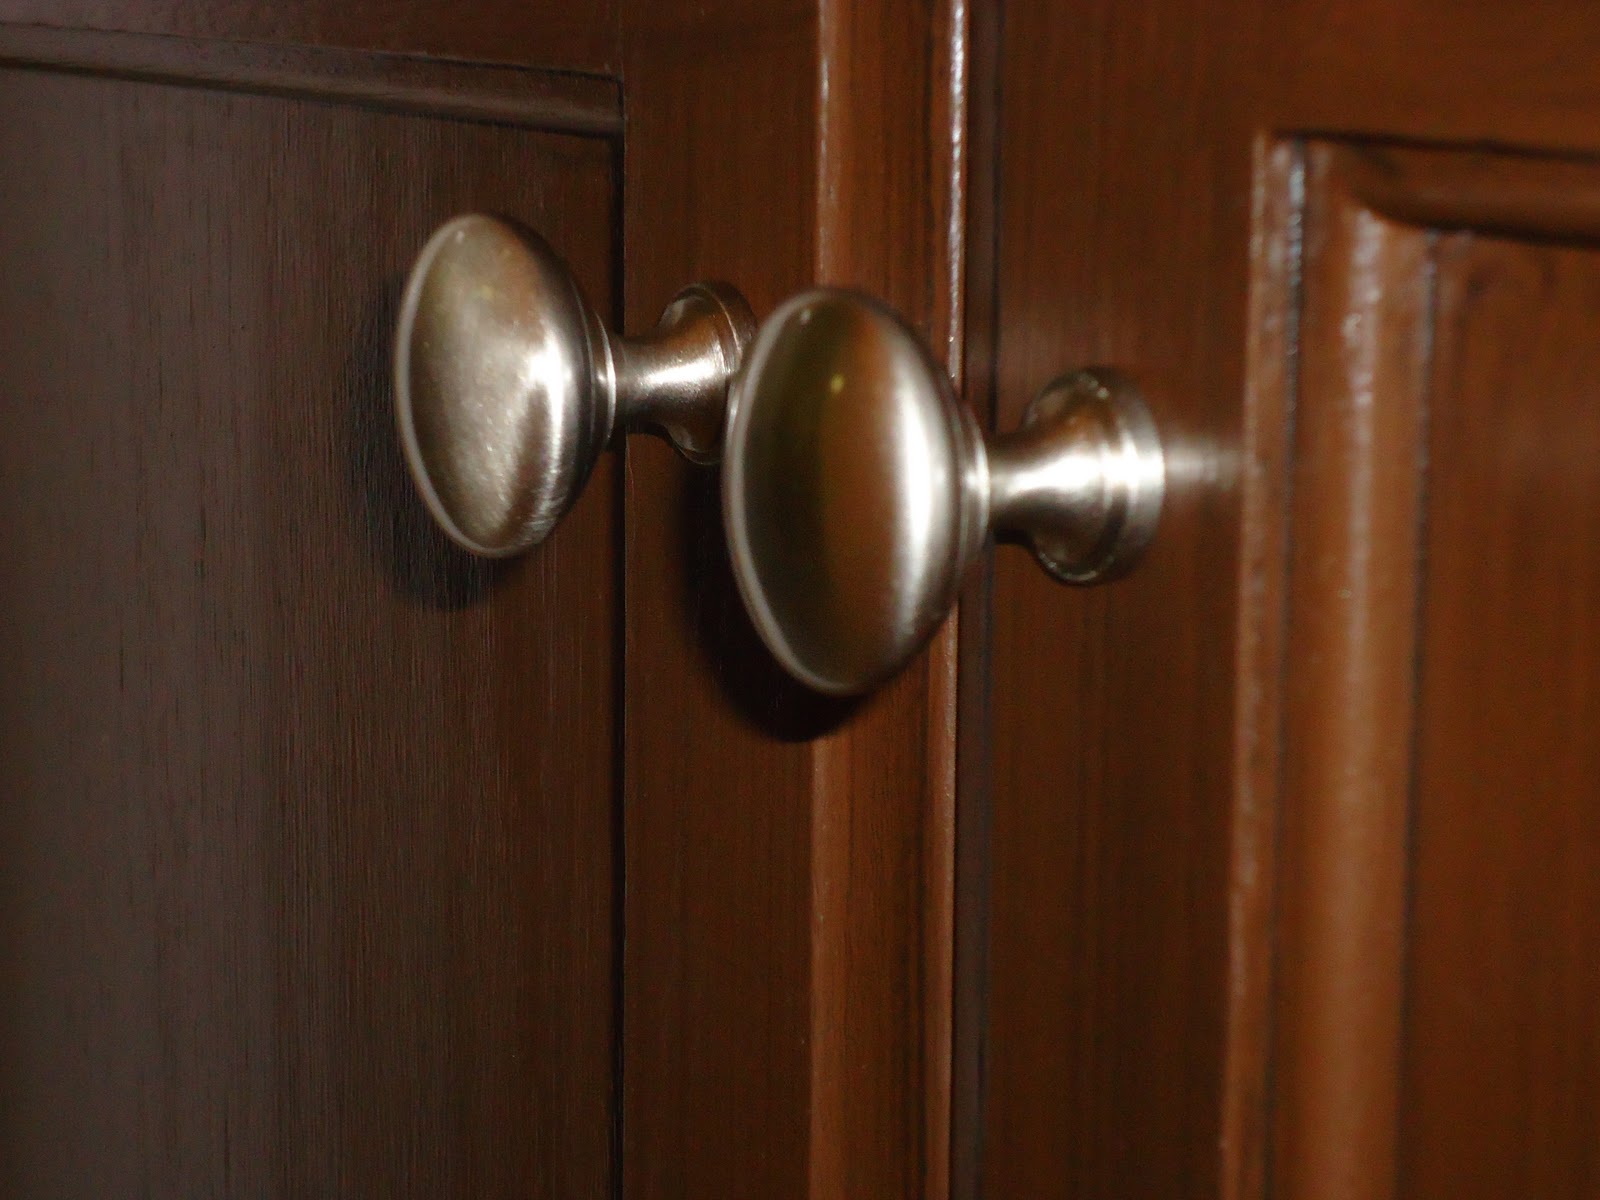
See the baseboards are screaming to be finished but hey... I got pies to bake and turkey to eat... so they will have to wait... but I can't even begin to describe the transformation. I wish I could bring everyone through my kitchen to see them in person cause my camera sucks and the pictures do not do them justice. All in all the project cost about $100 not counting "materials" like paint brushes etc. The Paint kit was around $70 and I'm happy to say that 1 kit did my entire kitchen, including the back of the bar and the half bath that's off the kitchen. I should have just barely enough to do the baseboards. I was extremely pleased as to how far it went. The knobs are pretty plain brushed nickel and I could have probably got them cheaper (just ask my mom) but I have no patience and didn't want to wait so to Home Depot I went and found a set of 25 for about $30 or so ( I don't exactly remember) after finishing the kitchen I have 4 knobs left which is more then enough for when I refinish the upstairs bath. I couldn't be happier with the results, and given the ease (albeit monotony) of the project I would recommend it to anyone who hates their cabinets... And now that this is finished it's on to one of the many other projects I've got floating around in my head... most likely up is the roman shade for the kitchen window... but first. PIES :)  


November 14, 2011

Color Combo Crush- Grey & Yellow

This by no means is a new combo, it's been around for a bit now but I've always liked it, just never felt it had a place in my old apartment. I'm thinking subconsciously this is why I wanted to paint the kitchen yellow. The intent in the kitchen was never to go with this scheme. The cabinets are (well almost all of them) deep brown and the nick-nacks on the shelves are various colors, so no one color combo was screaming out to me until one day a week or so ago I was perusing fabric online (as I often do) and be still my heart I came across this beauty...

via
I'm a sucker for a good geometric print, they are visually interesting but maintain some masculinity, and in this grey it spoke to me. Saying "hang me over your kitchen window, make a roman shade out of me, you know you want to" and well... I did. Also it happened to be on sale at 50% off I was able to get 2 yards for the price of one and at regularly $30/yard it was a steal. (it's currently 40% off at JoAnn's) Well today was like Christmas came early and I got my roll of fabric. At 54'' wide and 2 yards I have more then enough to  roll around in it like it's money  make my desired roman shade and then some. Other prints I'm in love with and thinking of using to make pillows for the kitchen table chairs a window covering of some kind for the half-bath

via 
via
so I really could go on and on with fabric swatches but I'll spare you my obsession.  But not with out leaving you with some glorious pictures of my new arrival.

next to the wall, seriously I need a better camera the pictures don't do it much justice. It's so yummy together. 
I plan to make a roman shade much like described here, now I've just got to finish the rest of the cabinets so I can move on to this project.


November 7, 2011

We Don't Need No Stink'n Cabinet...

One of the first things we did in the kitchen aside from painting was to take down the lone cabinet to the right of our sink. Upon first glance there was nothing wrong with said cabinet but upon further inspection we deemed it useless, or I did any way... with the positioning of the cabinet, and the fact that the doors didn't swing open wide, me and my short little frame and less then impressive arm span, I couldn't reach anything inside. I don't have any real good "before" pictures (no surprise there) but here is one from when we were painting where you can see where it was... 
see empty space next to window
Removing the cabinet seemed to open up the space which I liked, but clearly something would need to go up in it's place. The F-Hub lobbied for mounting a flat screen on the wall there... where I could see the appeal, I figured that with the 63 inch in the next room we really didn't need another 15 feet away. I have always been a fan of open shelving. thus enters my favorite store (IKEA) and my newest favorite find there...
The Fabian Wall Shelf. with a $6.99 price tag it beat out all the other shelf options I was looking at. Now it seems simple enough but since the wood is unfinished it opens up a world of options. Since I am in the midst of refinishing all the cabinets in the kitchen I just threw those in the mix and used the same paint on the shelves though I was tempted to be a little more adventurous and go for a splash of color but thought I'd play it safe with the kitchen. The installation is also very easy just be sure to use drywall screws/anchors or anything heavier then a pillow is gonna rip a regular screw out of the wall... and no I didn't learn this the hard way... I am all about drywall screws... I've just about mastered the technique. So anyhoo... after a few minutes with a drill, screwdriver and a level I had this....


Now I know I am awful when it comes to taking pictures along the way... but here they are in all their glory. The downside for some with the concept of open shelving is the need to make it pretty... since everyone can see it... you can't exactly store your Tupperware on them. But for me I can make it functional as well as aesthetically pleasing. I've got enough decorative items to make it interesting but I've also got my extra set of dishes, extra glasses, some of my serving platters and some personalized mugs to keep it functional. I do plan on moving the wicker baskets and hanging wine glass racks... but of all the screws I have... none that are small enough, so that will have to wait.  


The Vases and monogrammed mugs are from Anthropologie and most the dishes are from Ikea, everything else are just trinkets and odds and ends I had on hand. All in all I am very happy with the results. Now if only the rest the cabinets would paint themselves. 

UPDATE: I am almost done with all the lower cabinets and the bar. I should have that part of the project completed by Wednesday (fingers crossed) and then will move on to the uppers this weekend... hoping to wrap it all up by the end of next week and move on to the next project!

November 3, 2011

Cabinets Revealed!

Let's once again take a look at the before...


and now the shiny new after...


close up of the knobs... which by the way is no easy task to pick out considering picking between satin, pewter, brushed nickle, chrome, and those are just the silver finishes... and then do you pick "knobs" or "pulls" to save time and a little bit of my sanity I went with ones that would fit the existing holes so I didn't have to drill new ones. 


All and all I think this little test was a total success... having gone from this...


to this! 


I am in love with the results... but now the madness begins as I start on the Kitchen.

October 24, 2011

Let There be Light

... and a decent one at that. So revisiting the kitchen... I'm not very good at taking before pictures if you haven't noticed but from this picture from this post you can sort of see our spaceship of a light fixture over the table.


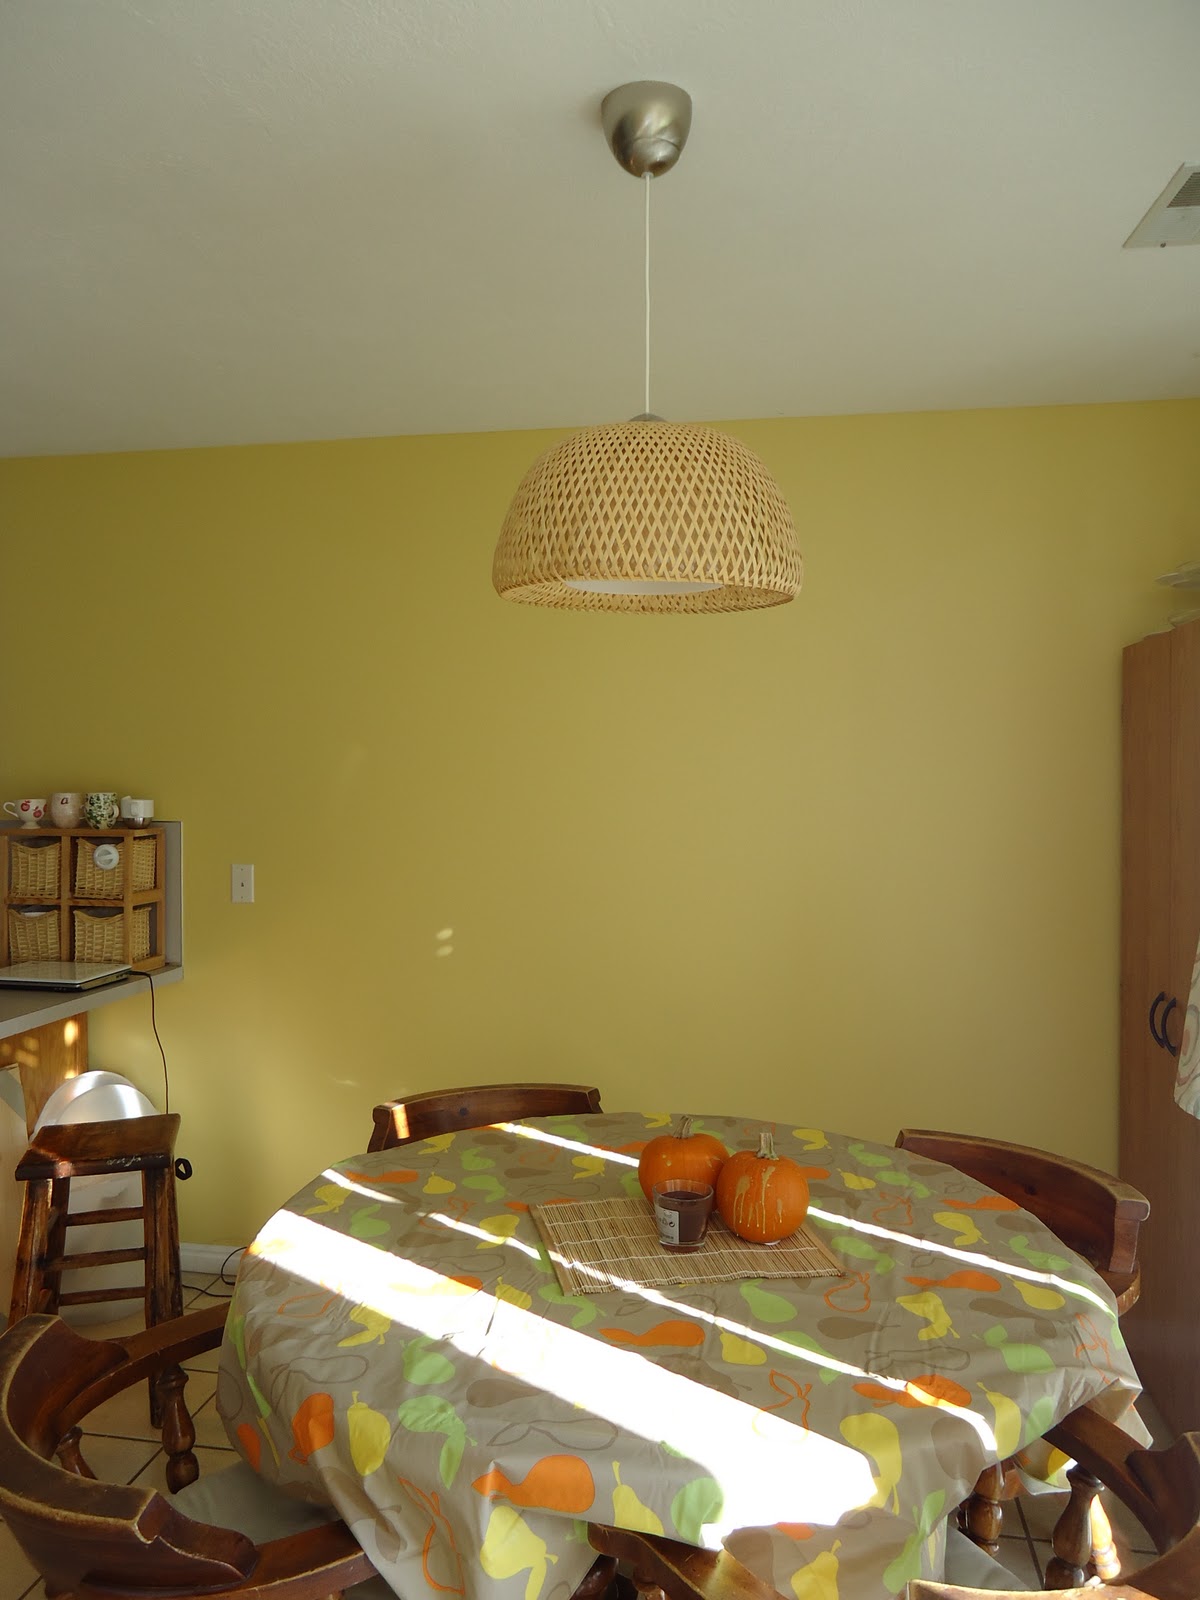
I also was not a fan of that. After given the opportunity to change it out I jumped and the chance and while on an outing to my favorite Swedish furniture store picked up this dandy.


We had Clint's parents over for dinner the other night and had them help us instal it. The process seemed easy enough but having never really dealt with electrical stuff thought it would be best left to some one who had a little experience. After a few moments with a screw driver, some wire cutters and a flashlight we had this

I think its perfect. Fits the space just as I had envisioned

would have closed the door but the animals were too busy staring at sheep
and looks good with the yellow wall...


Next up in the kitchen... refinishing the cabinets with this

via

My mom just used it on her cabinets and they look great. Ours right now are the yellow-ey oak with horrible brass knobs. we picked up the dark kit (the light kit is shown above) and had it tinted dark brown (chocolate to be exact) This could get interesting... wish me luck (when I get around to it... though this project is creeping up the list)


October 23, 2011

If You Can't Buy It... Paint It!

Okay that doesn't always work but in this case it did.... After we decided on wood floors for the living room we knew we'd need to get a rug to put down. After a brief search I stumbled upon this beauty at West Elm.

via
I was in love. the colors the shape everything was perfect, well almost everything. After realizing the price was a bit out of our budget we settled on a rug from Home Depot that was half the price. I was a bit heart broken as I was sure that rug was meant to be in our room. So.... I got creative (as I often do) and ran to the store to pick up a few supplies and after some tedious moments with a blank canvas and some pattern tape I came up with this...


I printed off a picture of the rug and laid down the tape lines accordingly. I then went on to mix and match paint to match the colors of the rug, though you could use any colors really. After the fact I realized it would have been easier to paint the whole canvas the neutral color between the color blocks since I didn't want to leave it white and it was a pain to go back in and cut the lines, but lesson learned I guess. 


The finished product now resides in the living room on the shelves above the couch. Styled with a few trinkets that were in my old apartment and a few new additions. I feel pretty good about it. It is a good substitute for the rug and the kaleidoscope pattern makes for interesting custom artwork and the cost of supplies (about $10 for the canvas and the pattern tape) was a steal in comparison to a $400 rug that my cat would have probably puked on anyway :) I guess the moral of this post is that if you like something that is out of reach like an expensive rug or painting or print... don't be afraid at trying your hand at reproducing it. You don't have to be an artist to make art and in the end I think it will mean more to you then dropping the money on the original item.  


October 21, 2011

Craft Time!!

As I continue to get things situated in the living room it occurred to me there were not many actually crafty touches. I'm a semi crafty girl but I'm not in to super cutesie over the top craft things I was aching to do something that would fit our style just right. So I made these...


Following this post at a favorite blog of mine. I followed the steps, and as you can see are actually super easy,I didn't make my leaves as big and I wish I'd used a heavier wire but all in all I think they turned out really pretty. I arranged them in my most favorite Anthropologie vase, that was a house warming gift from my sister and viola! they are now sitting on top a bookcase from my old apartment that houses our media collection.


I think it adds just the right touch. I've styled it with some candlesticks, an Ikea mirror, my deer plate from Park City that I picked up here, a picture from the first night me and the F-hub first really talked (Happy New Year indeed) and a picture of a historical church  (though not really sure which one) from our trip to Boston.


On the wall above it is a print I picked up on a trip to Seattle at the University of Washington Bookstore of Mt. Rainier. I try to surround myself with the things that make me happy, in life and when decorating. I think this little snippet of the living room is a good example of that. It's about the only part of the living room finishing touches I feel is finished and it def makes me happy happy every time I look at it. 

I've got more planned for the living room and can't wait to update on my latest project!

April 12, 2011

My Latest Obsession...

Thanks to this post from Ampersand Design Studio I am thinking of the possibilities... I've been looking for a new project and I think I may have found it... my inspiration is this lovely number from Anthropologie Did you know they make kits for dying silk? I've been looking at a few online here and here they are actually very reasonable. I like the look of the watercolor effect, where the colors bleed into each other and I'm thinking the above cowl neck shell could be easy to recreate plus there are mostly straight sewing lines... we know how I love that... I've made shells before so I'm thinking I could get close... hmmm.... perhaps I can add amateur clothing designer to the list of trades I pretend to be good at :) stay tuned!